Before anyone films a video, shoots an ad or draws the final pages of a comic, someone usually sketches the plan as a storyboard: one picture per shot, in order, with a short note about what happens and how long it lasts.
Most people already have those pictures. They are phone photos, screenshots, rough sketches or AI-generated frames sitting in a folder. What they don't have is a quick way to turn that folder into clean, numbered sheets they can print or send to a client.
In this tutorial, you'll build a browser-based tool that does exactly that. You'll add a set of images, give each one a title, a description and a duration, choose a layout, preview the sheets, and download a print-ready PDF.
Everything runs in the browser. The images are never uploaded to a server, which matters when the frames are unreleased product shots or client work.
Along the way, you'll learn how to fix sideways phone photos, sort files the way people expect, lay out a page in PDF points, wrap text on a canvas, save a draft with IndexedDB, and build a PDF that keeps photos sharp without making the file huge.
I built this tool for AllInOneTools, where it runs as the Image Storyboard to PDF tool. This article walks through a simplified version that you can build in three files.
What We'll Cover
- What This Image Storyboard Tool Does and How It Works
- Project Setup
- Libraries and Browser APIs Used
- Creating the HTML Layout
- Adding and Loading Images
- Managing the Frames
- Building the Board Settings
- Laying Out a Storyboard Sheet
- Drawing a Sheet on the Canvas
- Previewing the Sheets
- Saving a Draft with IndexedDB
- Generating the PDF with PDF-lib
- Renaming and Downloading
- Demo: How the Image Storyboard Tool Works
- Performance Tips
- Common Mistakes
- Conclusion
What This Image Storyboard Tool Does and How It Works
The tool takes a list of images and turns them into storyboard sheets. Each image becomes a frame with:
- a label, such as
Shot 1orScene 1 - an optional title
- a description of what happens
- an optional duration in seconds
The frames are placed on sheets in one of four layouts:
- One frame per page, for presenting each shot large
- Grid, for seeing the whole sequence at a glance
- Panels with notes, with ruled lines for handwritten notes on set
- Film strip, with sprocket holes for a classic look
Each sheet has a title, the total running time and a sheet number at the top.
Here's the flow from start to finish:
Images → frames (title, description, duration) → layout (where each box goes, in PDF points) → canvas (labels, text, lines) → PDF (photos as JPEG + one text layer per sheet) → download Why the Text Is Drawn on a Canvas
PDF-lib can write real text into a PDF, but only with a font file you embed. The standard PDF fonts only cover basic Latin characters, so a description in Hindi, Gujarati, Arabic or Japanese would fail.
A canvas, on the other hand, can draw any text the device can show, using the fonts the device already has. So this tool draws all the text on a canvas at 300 dpi and puts that canvas into the PDF as an image.
The trade-off is that the text in the PDF isn't selectable or searchable. For a storyboard, which is mostly printed and looked at, that's usually fine. If you need searchable text, you'd embed a font with PDF-lib's fontkit support instead.
Project Setup
You need only three files:
image-storyboard/ ├── index.html ├── style.css └── script.js Open index.html through a local server (for example, the Live Server extension in VS Code) rather than as a file:// page, so that IndexedDB and downloads behave the same way they will on a real site.
Libraries and Browser APIs Used
This project uses one library and a few built-in browser APIs:
- PDF-lib creates the PDF, embeds the JPEG and PNG images, and saves the file.
- Canvas API draws the sheets for the preview and the text layer of the PDF.
createImageBitmapdecodes images and applies the rotation stored in phone photos.- IndexedDB keeps a draft in the browser so the work survives a page reload.
You don't need PDF.js here, because there's no PDF to read. Everything starts from images.
Add PDF-lib with a pinned version at the end of the body, before your own script:
<script src="https://unpkg.com/pdf-lib@1.17.1/dist/pdf-lib.min.js"></script> <script src="script.js"></script> Pinning the version means a future release of the library can't break your tool without you knowing.
Creating the HTML Layout
The page has four parts:
- An upload area with a file input
- A bar that offers to restore a saved draft
- A frames panel with one card per image
- A settings panel and a preview panel
Here's the upload area and the draft bar:
<!-- 1. Upload --> <section id="uploadArea" class="upload-area"> <p>Drop images here or</p> <button type="button" id="selectBtn">Select images</button> <input type="file" id="fileInput" accept="image/jpeg,image/png,image/webp,image/gif" multiple hidden> <p id="statusText" class="status" aria-live="polite"></p> </section> <div id="draftBar" class="draft-bar" hidden> <span id="draftText"></span> <button type="button" id="restoreBtn">Restore</button> <button type="button" id="discardBtn">Discard</button> </div> The file input only accepts the formats every browser can decode: JPEG, PNG, WebP and GIF.
The workspace holds the three panels:
<!-- 2. Workspace --> <section id="workspace" class="workspace" hidden> <div class="frames-panel"> <div class="panel-head"> <h2>Frames</h2> <span id="totalTime"></span> </div> <label>Storyboard title <input type="text" id="boardTitle" placeholder="My video"> </label> <ol id="frameList" class="frame-list"></ol> <button type="button" id="undoBtn" hidden>Undo delete</button> <button type="button" id="addMoreBtn">Add more images</button> </div> The settings panel is a list of select and number inputs. Each one has an id that matches a key in the settings object you'll create in JavaScript:
<div class="settings-panel"> <h2>Board settings</h2> <label>Layout <select id="layout"> <option value="page">One frame per page</option> <option value="grid" selected>Grid</option> <option value="notes">Panels with notes</option> <option value="strip">Film strip</option> </select> </label> <label>Columns <input type="number" id="cols" min="1" max="6" value="3"></label> <label>Rows <input type="number" id="rows" min="1" max="6" value="2"></label> <!-- Paper, Orientation, Frame label, Font, Text size and Description lines follow the same pattern --> </div> The preview panel has the canvas, the sheet navigation and the download controls:
<div class="preview-panel"> <h2>Preview</h2> <canvas id="previewCanvas"></canvas> <div class="pager"> <button type="button" id="prevBtn">Previous</button> <span id="sheetInfo"></span> <button type="button" id="nextBtn">Next</button> </div> <label>File name <input type="text" id="fileName" value="storyboard"></label> <label>Image quality <select id="quality"> <option value="300">Print, 300 dpi</option> <option value="150">Smaller file, 150 dpi</option> </select> </label> <button type="button" id="downloadBtn" class="primary">Download PDF</button> <button type="button" id="resetBtn">Start over</button> <p id="resultText" class="status" aria-live="polite"></p> </div> In style.css, add one rule that's easy to forget:
[hidden] { display: none !important; } The workspace uses display: grid and the draft bar uses display: flex. Those rules are more specific than the browser's default style for the hidden attribute, so without this line, hidden elements would still show.
Selecting the Main Elements
At the top of script.js, set up the constants, the state and the element references:
// ---------- Constants ---------- const PAPERS = { a4: [595.28, 841.89], letter: [612, 792], a3: [841.89, 1190.55], slide: [405, 720], }; const FONTS = { sans: "Arial, Helvetica, 'Noto Sans', sans-serif", serif: "Georgia, 'Times New Roman', 'Noto Serif', serif", mono: "'Courier New', Courier, monospace", }; const THUMB_SIZE = 1000; const ACCEPTED = ['image/jpeg', 'image/png', 'image/webp', 'image/gif']; // ---------- State ---------- const state = { frames: [], title: '', sheet: 0, nextId: 1, lastDeleted: null, opts: { layout: 'grid', cols: 3, rows: 2, paper: 'a4', orient: 'landscape', label: 'shot', font: 'sans', textSize: 'm', lines: 3, }, }; // ---------- Elements ---------- const $ = (id) => document.getElementById(id); const els = { uploadArea: $('uploadArea'), fileInput: $('fileInput'), selectBtn: $('selectBtn'), statusText: $('statusText'), workspace: $('workspace'), frameList: $('frameList'), totalTime: $('totalTime'), boardTitle: $('boardTitle'), undoBtn: $('undoBtn'), addMoreBtn: $('addMoreBtn'), canvas: $('previewCanvas'), prevBtn: $('prevBtn'), nextBtn: $('nextBtn'), sheetInfo: $('sheetInfo'), fileName: $('fileName'), quality: $('quality'), downloadBtn: $('downloadBtn'), resetBtn: $('resetBtn'), resultText: $('resultText'), draftBar: $('draftBar'), draftText: $('draftText'), restoreBtn: $('restoreBtn'), discardBtn: $('discardBtn'), }; const SETTING_IDS = ['layout', 'cols', 'rows', 'paper', 'orient', 'label', 'font', 'textSize', 'lines']; The state object is the single source of truth. The frame list, the preview and the PDF are all built from it, which keeps them in sync.
The paper sizes are in PDF points. One point is 1/72 of an inch, so an A4 page is 595.28 × 841.89 points. You'll do all layout math in points and only convert to pixels when drawing.
Adding and Loading Images
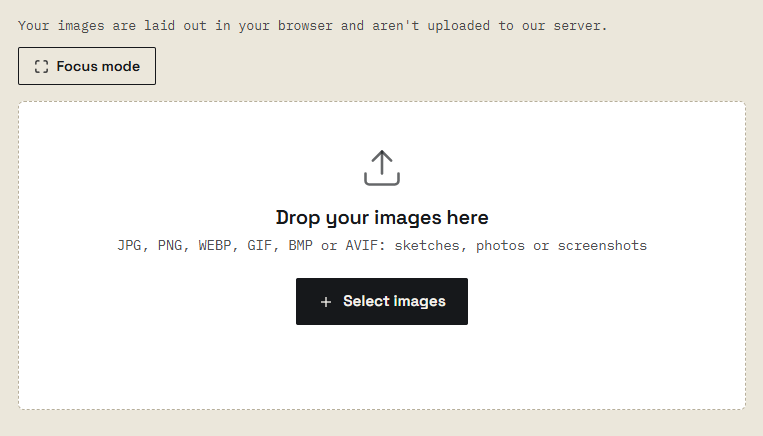
Opening Files from the Button or by Dropping Them
The "Select images" button opens the hidden file input, and dropping files anywhere on the page adds them too:
// ---------- Upload area ---------- els.selectBtn.addEventListener('click', () => els.fileInput.click()); els.addMoreBtn.addEventListener('click', () => els.fileInput.click()); els.fileInput.addEventListener('change', () => { addFiles(els.fileInput.files); els.fileInput.value = ''; }); ['dragenter', 'dragover'].forEach((type) => { document.addEventListener(type, (e) => { if (!e.dataTransfer.types.includes('Files')) return; e.preventDefault(); els.uploadArea.classList.add('dragover'); }); }); ['dragleave', 'drop'].forEach((type) => { document.addEventListener(type, () => els.uploadArea.classList.remove('dragover')); }); document.addEventListener('drop', (e) => { if (!e.dataTransfer.files.length) return; e.preventDefault(); addFiles(e.dataTransfer.files); }); function showWorkspace() { els.uploadArea.hidden = true; els.draftBar.hidden = true; els.workspace.hidden = false; } Resetting fileInput.value after each pick lets the user choose the same file again later. The dataTransfer.types.includes('Files') check makes sure the drop highlight only appears for files, not for frames being dragged inside the list.
Fixing Phone Photo Rotation
Phones don't rotate the pixels when you hold them sideways. They save the image in the sensor's orientation and add an EXIF tag that says "rotate this 90° when you show it."
If you draw such a photo on a canvas with an img element in some browsers, or read its width and height before the rotation is applied, the frame comes out sideways or with the wrong shape.
createImageBitmap with imageOrientation: 'from-image' asks the browser to apply the EXIF rotation while decoding:
// ---------- Loading images ---------- // Phone photos store their rotation in EXIF. imageOrientation: 'from-image' // asks the browser to apply it, so the picture comes out the right way up. function decodeImage(blob) { if ('createImageBitmap' in window) { return createImageBitmap(blob, { imageOrientation: 'from-image' }) .catch(() => loadWithImgTag(blob)); } return loadWithImgTag(blob); } function loadWithImgTag(blob) { return new Promise((resolve, reject) => { const url = URL.createObjectURL(blob); const img = new Image(); img.onload = () => { URL.revokeObjectURL(url); resolve(img); }; img.onerror = () => { URL.revokeObjectURL(url); reject(new Error('decode')); }; img.src = url; }); } function canvasToBlob(canvas, type, quality) { return new Promise((resolve, reject) => { canvas.toBlob((b) => (b ? resolve(b) : reject(new Error('encode'))), type, quality); }); } If createImageBitmap isn't available or fails, the code falls back to a normal img element. Modern browsers apply EXIF rotation to img elements by default too.
canvasToBlob wraps the callback-based canvas.toBlob() in a Promise, so you can use it with await.
Making a Frame Object with a Thumbnail
A phone photo can be 4000 × 3000 pixels or more. Drawing dozens of those every time the user types a letter would make the preview slow.
So each frame keeps the original file for the PDF, plus a small JPEG copy (at most 1000 pixels on its longest side) for the frame list and the preview:
async function makeFrame(file) { const pic = await decodeImage(file); const w = pic.naturalWidth || pic.width; const h = pic.naturalHeight || pic.height; // A small copy for the frame list and the preview const scale = Math.min(1, THUMB_SIZE / Math.max(w, h)); const c = document.createElement('canvas'); c.width = Math.round(w * scale); c.height = Math.round(h * scale); const ctx = c.getContext('2d'); ctx.fillStyle = '#ffffff'; ctx.fillRect(0, 0, c.width, c.height); ctx.drawImage(pic, 0, 0, c.width, c.height); if (pic.close) pic.close(); const thumb = await canvasToBlob(c, 'image/jpeg', 0.86); return { id: 'f' + state.nextId++, blob: file, name: file.name, w, h, thumb, thumbUrl: URL.createObjectURL(thumb), thumbPic: null, title: '', desc: '', dur: '', }; } Notice that w and h are read after decoding, so they're the size after rotation. A portrait phone photo gets a portrait frame.
The white fill before drawing matters for PNG images with transparency. JPEG has no transparency, so transparent areas would otherwise turn black.
Sorting by File Name
People name their files shot-1.jpg, shot-2.jpg … shot-10.jpg. A normal string sort puts shot-10 before shot-2, because it compares the character 1 with 2.
localeCompare with the numeric option compares the numbers inside the names as numbers:
// "shot-2.jpg" before "shot-10.jpg" function naturalCompare(a, b) { return a.localeCompare(b, undefined, { numeric: true, sensitivity: 'base' }); } Adding the Files
addFiles filters out unsupported files, sorts the rest, turns each into a frame and reports anything it skipped:
async function addFiles(fileList) { const files = Array.from(fileList); const images = files.filter((f) => ACCEPTED.includes(f.type)) .sort((a, b) => naturalCompare(a.name, b.name)); const skipped = files.length - images.length; let failed = 0; for (let i = 0; i < images.length; i++) { els.statusText.textContent = `Reading image ${i + 1} of ${images.length}...`; try { state.frames.push(await makeFrame(images[i])); } catch (err) { failed++; } } const notes = []; if (skipped) notes.push(`${skipped} file(s) skipped: not JPG, PNG, WebP or GIF`); if (failed) notes.push(`${failed} image(s) couldn't be read`); els.statusText.textContent = notes.join('. '); if (state.frames.length) { showWorkspace(); renderFrameList(); drawPreview(); saveDraftSoon(); } } The images are read one at a time, not all at once with Promise.all. Decoding 50 large photos in parallel can run a phone out of memory, and reading them in order also keeps the status message accurate.
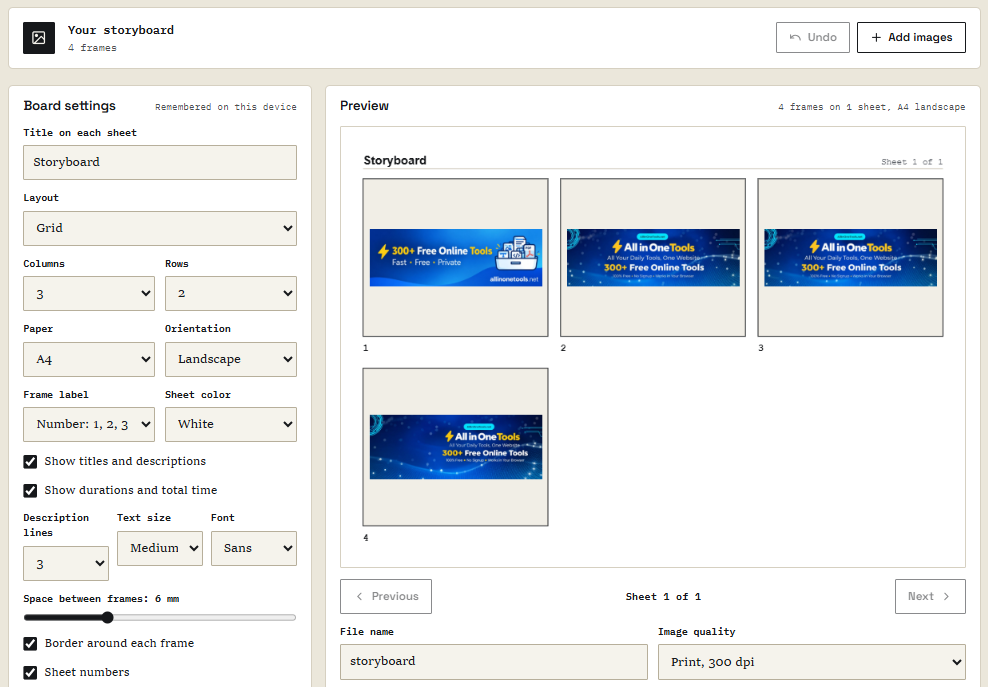
Managing the Frames
The Frame Card
Each frame gets a card with its thumbnail, a title field, a description box, a duration field and three buttons:
// ---------- Frame list ---------- function escapeHtml(s) { const map = { '&': '&', '<': '<', '>': '>', '"': '"', "'": ''' }; return String(s).replace(/[&<>"']/g, (c) => map[c]); } function renderFrameList() { els.frameList.innerHTML = state.frames.map((f, i) => ` <li class="frame-card" data-id="${f.id}"> <img src="${f.thumbUrl}" alt="" draggable="true"> <div> <span class="num">${i + 1}. ${escapeHtml(f.name)}</span> <input type="text" data-field="title" placeholder="Title" value="${escapeHtml(f.title)}"> <textarea data-field="desc" placeholder="What happens">${escapeHtml(f.desc)}</textarea> <input type="number" data-field="dur" min="0" step="0.5" placeholder="Seconds" value="${f.dur}"> <div class="frame-tools"> <button type="button" data-act="up" aria-label="Move frame ${i + 1} up">Up</button> <button type="button" data-act="down" aria-label="Move frame ${i + 1} down">Down</button> <button type="button" data-act="delete" aria-label="Delete frame ${i + 1}">Delete</button> </div> </div> </li>`).join(''); updateTotal(); } function updateTotal() { const total = totalDuration(); els.totalTime.textContent = `${state.frames.length} frames` + (total ? `, ${formatDuration(total)}` : ''); } function findFrame(el) { const li = el.closest('[data-id]'); return li ? state.frames.findIndex((f) => f.id === li.dataset.id) : -1; } Titles and descriptions come from the user, so they're escaped before going into the HTML. Without escapeHtml, a title like Shot "A" would break the value attribute.
Updating the State While Typing
If you rebuilt the whole list on every key press, the text field would lose focus after each letter. Instead, one input listener on the list updates only the state:
els.frameList.addEventListener('input', (e) => { const i = findFrame(e.target); const field = e.target.dataset.field; if (i < 0 || !field) return; state.frames[i][field] = e.target.value; updateTotal(); drawPreviewSoon(); saveDraftSoon(); }); This uses event delegation: one listener on the list handles every field in every card, including cards added later. The data-field attribute tells it which property to update.
The preview redraw is delayed with drawPreviewSoon(), which you'll write later, so it runs once when the user pauses typing rather than on every letter.
Durations and the Total Running Time
Durations are stored in seconds and shown as 4.5 s under a minute or 1:10 from one minute up:
// ---------- Durations ---------- function formatDuration(seconds) { const s = Number(seconds) || 0; if (s <= 0) return ''; if (s < 60) return `${Math.round(s * 10) / 10} s`; const m = Math.floor(s / 60); const r = Math.round(s - m * 60); return `${m}:${String(r).padStart(2, '0')}`; } function totalDuration() { return state.frames.reduce((sum, f) => sum + (Number(f.dur) || 0), 0); } 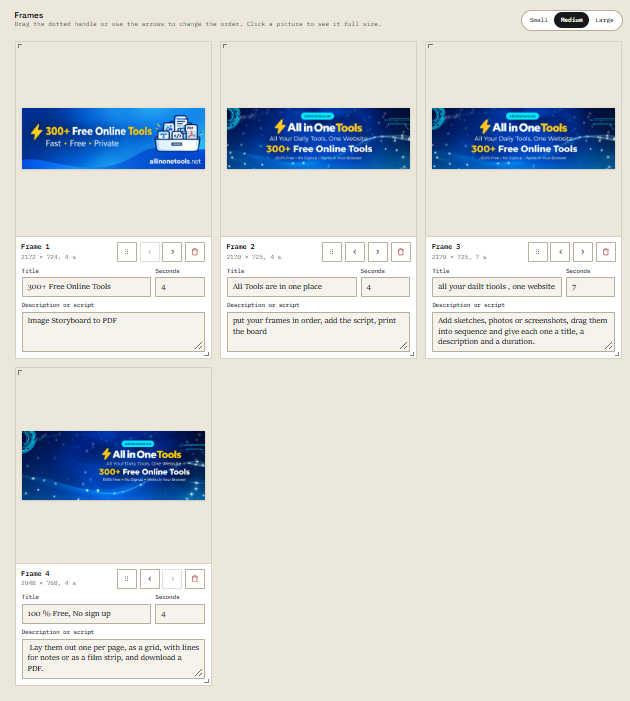
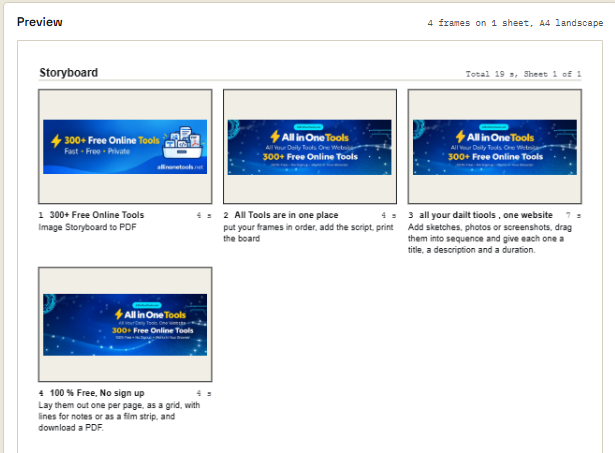
Reordering Frames
The Up and Down buttons, and the Delete button, are handled by one click listener:
els.frameList.addEventListener('click', (e) => { const btn = e.target.closest('[data-act]'); if (!btn) return; const i = findFrame(btn); if (btn.dataset.act === 'up') moveFrame(i, i - 1); if (btn.dataset.act === 'down') moveFrame(i, i + 1); if (btn.dataset.act === 'delete') deleteFrame(i); }); function moveFrame(from, to) { if (to < 0 || to >= state.frames.length || from === to) return; const [frame] = state.frames.splice(from, 1); state.frames.splice(to, 0, frame); renderFrameList(); drawPreview(); saveDraftSoon(); } splice(from, 1) removes the frame, and splice(to, 0, frame) puts it back at its new position.
For mouse users, dragging a thumbnail onto another card moves it there. The HTML5 drag and drop API needs preventDefault() in dragover, or the browser won't allow the drop:
// Drag a thumbnail onto another card to move it there let dragIndex = -1; els.frameList.addEventListener('dragstart', (e) => { dragIndex = findFrame(e.target); e.dataTransfer.effectAllowed = 'move'; e.target.closest('li').classList.add('dragging'); }); els.frameList.addEventListener('dragover', (e) => { if (dragIndex > -1) e.preventDefault(); }); els.frameList.addEventListener('drop', (e) => { if (dragIndex < 0) return; e.preventDefault(); e.stopPropagation(); const to = findFrame(e.target); moveFrame(dragIndex, to < 0 ? state.frames.length - 1 : to); dragIndex = -1; }); els.frameList.addEventListener('dragend', () => { dragIndex = -1; els.frameList.querySelectorAll('.dragging').forEach((li) => li.classList.remove('dragging')); }); stopPropagation() in the drop handler stops the document-level drop handler from treating the move as a new file drop.
Keep the Up and Down buttons even with drag and drop. Drag and drop doesn't work with a keyboard, and it's awkward on touch screens.
Deleting a Frame with Undo
Deleting a frame that has a long description typed into it is painful if it was a mistake. So the tool keeps the last deleted frame and its position:
function deleteFrame(i) { const [frame] = state.frames.splice(i, 1); state.lastDeleted = { frame, index: i }; els.undoBtn.hidden = false; renderFrameList(); drawPreview(); saveDraftSoon(); } els.undoBtn.addEventListener('click', () => { if (!state.lastDeleted) return; const { frame, index } = state.lastDeleted; state.frames.splice(Math.min(index, state.frames.length), 0, frame); state.lastDeleted = null; els.undoBtn.hidden = true; renderFrameList(); drawPreview(); saveDraftSoon(); }); Math.min(index, state.frames.length) puts the frame back at the end if the list got shorter in the meantime.
Building the Board Settings
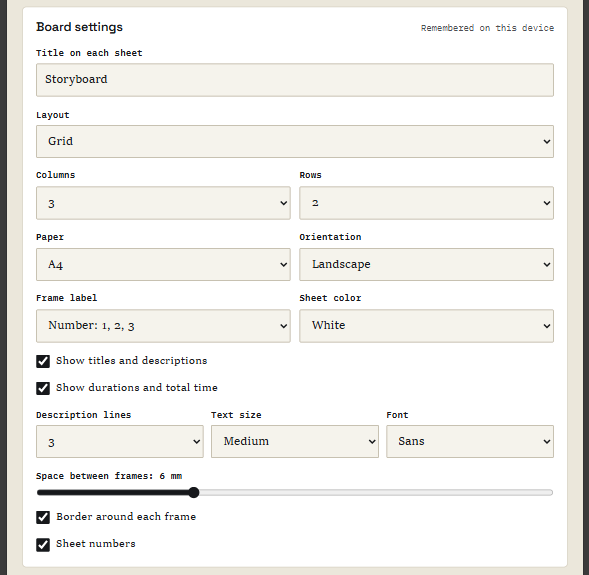
All settings are read into state.opts in one place, with the number fields limited to a sensible range:
// ---------- Settings ---------- function readSettings() { const o = state.opts; SETTING_IDS.forEach((id) => { o[id] = $(id).value; }); o.cols = Math.min(6, Math.max(1, parseInt(o.cols, 10) || 1)); o.rows = Math.min(6, Math.max(1, parseInt(o.rows, 10) || 1)); o.lines = Math.min(6, Math.max(1, parseInt(o.lines, 10) || 1)); } SETTING_IDS.forEach((id) => { $(id).addEventListener('change', () => { readSettings(); state.sheet = 0; drawPreview(); }); }); els.boardTitle.addEventListener('input', () => { state.title = els.boardTitle.value.trim(); drawPreviewSoon(); saveDraftSoon(); }); Any change goes back to the first sheet and redraws the preview. The board title is saved as a draft too, because it's part of the user's work.
The four layouts change only the arrangement. The frame data stays the same, so users can switch layouts freely without losing anything.
Laying Out a Storyboard Sheet
This is the heart of the tool. Before drawing anything, the code works out where every box goes, in PDF points from the top-left corner of the sheet.
Keeping layout separate from drawing means the same layout is used for the small preview on screen and for the 300 dpi PDF. They can't drift apart.
Calculating the Sheet Size
// ---------- Layout: where everything goes, in PDF points from the top-left ---------- function sheetSize(o) { const [a, b] = PAPERS[o.paper]; const short = Math.min(a, b); const long = Math.max(a, b); return o.orient === 'portrait' ? [short, long] : [long, short]; } The paper sizes are stored once. Landscape just swaps the short and long sides.
Laying Out the Frame Boxes
function computeLayout(o, frameCount) { const [W, H] = sheetSize(o); const short = Math.min(W, H); const margin = short * 0.05; const gap = 10; const cols = o.layout === 'page' ? 1 : o.cols; const rows = o.layout === 'page' ? 1 : o.rows; const perSheet = cols * rows; const sheets = Math.max(1, Math.ceil(frameCount / perSheet)); const headH = short * 0.045; // the title row at the top of each sheet const top = margin + headH + margin * 0.5; const box = { x: margin, y: top, w: W - 2 * margin, h: H - top - margin }; const sizeScale = { s: 0.85, m: 1, l: 1.2 }[o.textSize]; const cellW = (box.w - (cols - 1) * gap) / cols; const cellH = (box.h - (rows - 1) * gap) / rows; const cells = []; for (let r = 0; r < rows; r++) { for (let c = 0; c < cols; c++) { const x = box.x + c * (cellW + gap); const y = box.y + r * (cellH + gap); const fs = Math.min(13, Math.max(6.5, cellW * 0.05)) * sizeScale; const lh = fs * 1.3; if (o.layout === 'notes') { // picture on the left, title and ruled lines on the right const imgW = Math.min(cellW * 0.5, cellH * 1.6); const tx = x + imgW + 8; cells.push({ img: { x, y, w: imgW, h: cellH }, text: { x: tx, y, w: x + cellW - tx, h: cellH }, fs, lh, notes: true }); } else { // picture on top, text underneath const textH = lh * (1.2 + Number(o.lines)) + fs * 0.6; const imgH = Math.max(10, cellH - textH); cells.push({ img: { x, y, w: cellW, h: imgH }, text: { x, y: y + imgH + fs * 0.6, w: cellW, h: textH - fs * 0.6 }, fs, lh, strip: o.layout === 'strip' }); } } } return { W, H, margin, headH, perSheet, sheets, cells }; } Here's what happens step by step:
- The margin is
5%of the short side, so it scales with the paper. - The "One frame per page" layout is a 1 × 1 grid.
- The number of sheets is the number of frames divided by the frames per sheet, rounded up.
- A row at the top is kept for the sheet heading.
- The remaining box is split into equal cells with a fixed gap.
- The font size depends on the cell width (
5%of it), kept between6.5and13points, then scaled by the Text size setting. - In most layouts, the picture sits on top and the text underneath. The text area is sized for the label line plus the chosen number of description lines.
- In "Panels with notes", the picture is on the left and the text and ruled lines on the right.
Each cell ends up with an img box and a text box, and that's all the drawing code needs to know.
Fitting an Image Without Stretching It
A cell is rarely the same shape as the picture. Stretching would distort faces and products, and cropping might cut off what matters. So the picture is scaled to fit inside the box, keeping its proportions, and centered:
function fitContain(imgW, imgH, box) { const s = Math.min(box.w / imgW, box.h / imgH); const w = imgW * s; const h = imgH * s; return { x: box.x + (box.w - w) / 2, y: box.y + (box.h - h) / 2, w, h }; } This is the same idea as object-fit: contain in CSS. The smaller of the two scale factors wins, so the whole picture always fits.
Drawing a Sheet on the Canvas
Wrapping Text into Lines
Canvas has no automatic line wrapping. fillText draws one line, however long it is. So you measure words with measureText and build the lines yourself:
// ---------- Text ---------- function wrapText(ctx, text, maxWidth, maxLines) { const words = String(text).trim().split(/\s+/).filter(Boolean); const lines = []; let line = ''; for (const word of words) { const test = line ? line + ' ' + word : word; if (ctx.measureText(test).width <= maxWidth || !line) { line = test; } else { lines.push(line); line = word; } } if (line) lines.push(line); if (lines.length > maxLines) { lines.length = maxLines; let last = lines[maxLines - 1]; while (last && ctx.measureText(last + '…').width > maxWidth) last = last.slice(0, -1); lines[maxLines - 1] = last.trimEnd() + '…'; } return lines; } If the description is longer than the lines available, the last line ends with an ellipsis, so the user can see that text was cut.
Drawing Labels, Titles and Durations
function frameLabel(o, index) { if (o.label === 'number') return String(index + 1); if (o.label === 'scene') return `Scene ${index + 1}`; if (o.label === 'shot') return `Shot ${index + 1}`; return ''; } function drawFrameText(ctx, o, cell, frame, index, k) { const fs = cell.fs * k; const lh = cell.lh * k; const x = cell.text.x * k; const w = cell.text.w * k; let y = cell.text.y * k + fs; ctx.fillStyle = '#16181b'; ctx.textBaseline = 'alphabetic'; // Line 1: label and title on the left, duration on the right const dur = formatDuration(frame.dur); let room = w; if (dur) { ctx.font = `${fs}px ${FONTS.mono}`; ctx.textAlign = 'right'; ctx.fillText(dur, x + w, y); room -= ctx.measureText(dur).width + fs; } ctx.textAlign = 'left'; const head = [frameLabel(o, index), frame.title.trim()].filter(Boolean).join(' '); if (head) { ctx.font = `bold ${fs}px ${FONTS[o.font]}`; ctx.fillText(wrapText(ctx, head, room, 1)[0] || '', x, y); } y += lh * 1.2; // Description, wrapped and cut to the chosen number of lines ctx.font = `${fs}px ${FONTS[o.font]}`; const maxLines = cell.notes ? Math.floor((cell.text.h * k - lh * 1.2) / lh) : Number(o.lines); const lines = frame.desc.trim() ? wrapText(ctx, frame.desc, w, maxLines) : []; lines.forEach((line, j) => ctx.fillText(line, x, y + j * lh)); // Ruled lines for handwritten notes if (cell.notes) { ctx.strokeStyle = '#c9c6bd'; ctx.lineWidth = Math.max(1, 0.6 * k); const bottom = (cell.text.y + cell.text.h) * k; for (let ly = y + lines.length * lh; ly < bottom - 2; ly += lh * 1.25) { ctx.beginPath(); ctx.moveTo(x, ly); ctx.lineTo(x + w, ly); ctx.stroke(); } } } The parameter k is the scale from points to pixels. All positions come from the layout in points and are multiplied by k just before drawing. That's what lets the same function draw a 600-pixel preview and a 300 dpi PDF page.
The duration is drawn first, right-aligned, and the space it takes is subtracted from the room left for the label and title. That way a long title never runs into the duration.
Drawing the Whole Sheet
drawSheet draws the heading, then each frame on the sheet:
// ---------- Drawing one sheet ---------- // k turns PDF points into canvas pixels. With mode 'preview' the pictures are // drawn too; with mode 'overlay' their boxes are left transparent for the PDF. async function drawSheet(ctx, o, L, sheetIndex, k, mode) { const W = L.W * k; const H = L.H * k; const placed = []; ctx.clearRect(0, 0, W, H); ctx.fillStyle = '#ffffff'; ctx.fillRect(0, 0, W, H); // Sheet heading: title on the left, total time and sheet number on the right const headFs = L.headH * 0.6 * k; const base = (L.margin + L.headH * 0.78) * k; const total = totalDuration(); const right = [total ? `Total ${formatDuration(total)}` : '', `Sheet ${sheetIndex + 1} of ${L.sheets}`].filter(Boolean).join(', '); ctx.font = `${headFs * 0.72}px ${FONTS.mono}`; ctx.fillStyle = '#55585e'; ctx.textAlign = 'right'; ctx.fillText(right, W - L.margin * k, base); if (state.title) { ctx.font = `bold ${headFs}px ${FONTS[o.font]}`; ctx.fillStyle = '#16181b'; ctx.textAlign = 'left'; ctx.fillText(state.title, L.margin * k, base); } ctx.strokeStyle = '#c9c6bd'; ctx.lineWidth = Math.max(1, 0.75 * k); ctx.beginPath(); ctx.moveTo(L.margin * k, (L.margin + L.headH) * k); ctx.lineTo(W - L.margin * k, (L.margin + L.headH) * k); ctx.stroke(); const start = sheetIndex * L.perSheet; const items = state.frames.slice(start, start + L.perSheet); for (let i = 0; i < items.length; i++) { const cell = L.cells[i]; const frame = items[i]; // Film strip: a dark band with sprocket holes behind the picture if (cell.strip) { const b = cell.img; const hole = b.h * 0.08; ctx.fillStyle = '#16181b'; ctx.fillRect(b.x * k, b.y * k, b.w * k, b.h * k); ctx.fillStyle = '#ffffff'; for (let hx = b.x + hole; hx + hole < b.x + b.w; hx += hole * 2) { ctx.fillRect(hx * k, (b.y + hole * 0.3) * k, hole * k, hole * 0.5 * k); ctx.fillRect(hx * k, (b.y + b.h - hole * 0.8) * k, hole * k, hole * 0.5 * k); } } const area = cell.strip ? { x: cell.img.x, y: cell.img.y + cell.img.h * 0.12, w: cell.img.w, h: cell.img.h * 0.76 } : cell.img; const rect = fitContain(frame.w, frame.h, area); placed.push({ frame, rect }); const px = { x: Math.round(rect.x * k), y: Math.round(rect.y * k), w: Math.round(rect.w * k), h: Math.round(rect.h * k) }; if (mode === 'overlay') { ctx.clearRect(px.x, px.y, px.w, px.h); } else { if (!frame.thumbPic) frame.thumbPic = await decodeImage(frame.thumb); ctx.drawImage(frame.thumbPic, px.x, px.y, px.w, px.h); } if (!cell.strip) { ctx.strokeStyle = '#16181b'; ctx.lineWidth = Math.max(1, 0.9 * k); ctx.strokeRect(cell.img.x * k, cell.img.y * k, cell.img.w * k, cell.img.h * k); } drawFrameText(ctx, o, cell, frame, start + i, k); } return placed; } The mode parameter is the important trick here:
- In
'preview'mode, the pictures are drawn from the thumbnails. - In
'overlay'mode, the picture areas are cleared to transparent, and the function returns where each picture should go.
You'll see why in the PDF section. For the film strip, the dark band and the sprocket holes are drawn first, and the picture sits in the middle of the band.
Previewing the Sheets
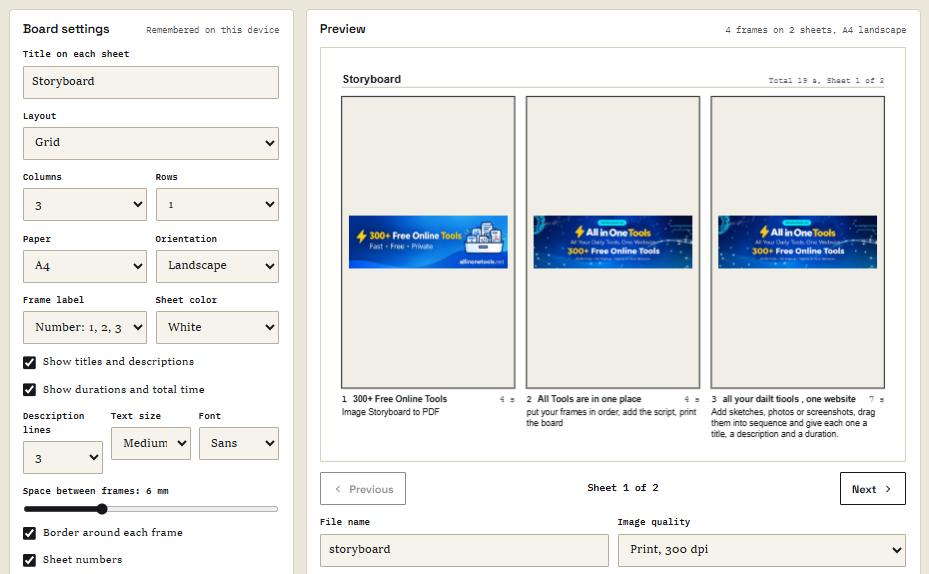
The preview draws the current sheet at the canvas's on-screen width, multiplied by the device pixel ratio so it stays sharp on high-density screens:
// ---------- Preview ---------- let previewTimer = null; function drawPreviewSoon() { clearTimeout(previewTimer); previewTimer = setTimeout(drawPreview, 150); } async function drawPreview() { if (!state.frames.length) return; const o = state.opts; const L = computeLayout(o, state.frames.length); state.sheet = Math.min(state.sheet, L.sheets - 1); // Draw at the canvas's on-screen width, sharp on high-density screens const cssWidth = els.canvas.clientWidth || 600; const k = (cssWidth * Math.min(2, window.devicePixelRatio || 1)) / L.W; els.canvas.width = Math.round(L.W * k); els.canvas.height = Math.round(L.H * k); await drawSheet(els.canvas.getContext('2d'), o, L, state.sheet, k, 'preview'); els.sheetInfo.textContent = `Sheet ${state.sheet + 1} of ${L.sheets}`; els.prevBtn.disabled = state.sheet === 0; els.nextBtn.disabled = state.sheet >= L.sheets - 1; } els.prevBtn.addEventListener('click', () => { state.sheet--; drawPreview(); }); els.nextBtn.addEventListener('click', () => { state.sheet++; drawPreview(); }); The device pixel ratio is capped at 2. A 3× phone screen would otherwise create a canvas nine times the size of the CSS box, which is slow and adds little you can see.
Saving a Draft with IndexedDB
Writing descriptions for 30 frames takes time. Losing that work to an accidental reload is frustrating, so the tool saves a draft as the user works.
localStorage won't do here. It only stores strings, and most browsers limit it to about 5 MB, which is less than two phone photos. IndexedDB can store Blob objects directly and allows far more space.
Opening the Database
// ---------- Draft in IndexedDB ---------- const DB_NAME = 'image-storyboard'; let dbPromise = null; function openDb() { if (!dbPromise) { dbPromise = new Promise((resolve, reject) => { const req = indexedDB.open(DB_NAME, 1); req.onupgradeneeded = () => req.result.createObjectStore('drafts'); req.onsuccess = () => resolve(req.result); req.onerror = () => reject(req.error); }); } return dbPromise; } async function dbRun(mode, work) { const db = await openDb(); return new Promise((resolve, reject) => { const tx = db.transaction('drafts', mode); const result = work(tx.objectStore('drafts')); tx.oncomplete = () => resolve(result && result.result); tx.onerror = () => reject(tx.error); }); } dbRun wraps a transaction in a Promise. It resolves when the transaction completes, so a write is only reported as done once it's actually stored.
Saving the Draft
let saveTimer = null; function saveDraftSoon() { clearTimeout(saveTimer); saveTimer = setTimeout(saveDraft, 800); } function saveDraft() { const draft = { title: state.title, savedAt: Date.now(), frames: state.frames.map(({ blob, name, title, desc, dur }) => ({ blob, name, title, desc, dur })), }; return dbRun('readwrite', (store) => store.put(draft, 'current')).catch(() => { els.resultText.textContent = 'This browser could not save a draft. Download the PDF before closing the tab.'; }); } The draft stores the original image files as Blobs, along with the text the user typed. Thumbnails and object URLs aren't stored, because they can be made again from the files.
saveDraftSoon waits until the user pauses for 800 ms, so typing a description doesn't write to the database on every key press.
If saving fails, for example in a private window with storage blocked, the tool tells the user to download the PDF before closing the tab instead of failing silently.
Restoring the Draft
When the page loads, the tool checks for a draft and offers to restore it:
async function checkDraft() { try { const draft = await dbRun('readonly', (store) => store.get('current')); if (!draft || !draft.frames.length) return; els.draftText.textContent = `You have a saved storyboard with ${draft.frames.length} frames.`; els.draftBar.hidden = false; } catch (err) { /* no storage: nothing to restore */ } } els.restoreBtn.addEventListener('click', async () => { const draft = await dbRun('readonly', (store) => store.get('current')); for (const saved of draft.frames) { const file = new File([saved.blob], saved.name, { type: saved.blob.type }); const frame = await makeFrame(file); Object.assign(frame, { title: saved.title, desc: saved.desc, dur: saved.dur }); state.frames.push(frame); } state.title = draft.title || ''; els.boardTitle.value = state.title; showWorkspace(); renderFrameList(); drawPreview(); }); els.discardBtn.addEventListener('click', () => { dbRun('readwrite', (store) => store.delete('current')); els.draftBar.hidden = true; }); Each saved Blob goes back through makeFrame, so restored frames get fresh thumbnails, and then the saved text is copied onto them.
Generating the PDF with PDF-lib
The simplest way to make the PDF would be to draw each whole sheet on a canvas, with the pictures, and put that canvas in the PDF as one image. It works, but it forces a choice:
- Save it as PNG and the photos make the file huge.
- Save it as JPEG and the text and thin lines get blurry edges.
So the tool uses two layers on each page:
- Pictures as JPEG, each at the resolution the user chose, placed exactly in its box
- Text, labels and lines as one transparent PNG at 300 dpi, covering the whole page on top
JPEG is good for photos, and PNG keeps text sharp. This is why drawSheet has the 'overlay' mode that leaves holes where the pictures go.
Turning Each Picture into a JPEG
// ---------- Making the PDF ---------- async function imageAsJpeg(frame, widthPx, heightPx) { const pic = await decodeImage(frame.blob); const c = document.createElement('canvas'); c.width = Math.max(1, Math.round(widthPx)); c.height = Math.max(1, Math.round(heightPx)); const ctx = c.getContext('2d'); ctx.fillStyle = '#ffffff'; // transparent PNGs get a white background ctx.fillRect(0, 0, c.width, c.height); ctx.imageSmoothingQuality = 'high'; ctx.drawImage(pic, 0, 0, c.width, c.height); if (pic.close) pic.close(); const blob = await canvasToBlob(c, 'image/jpeg', 0.9); return new Uint8Array(await blob.arrayBuffer()); } The picture is decoded again from the original file, not from the thumbnail, so the PDF has full quality.
Building the Pages
async function buildPdf() { const { PDFDocument } = PDFLib; const o = state.opts; const L = computeLayout(o, state.frames.length); const dpi = Number(els.quality.value); const k = 300 / 72; // text layer at 300 dpi const pdf = await PDFDocument.create(); for (let s = 0; s < L.sheets; s++) { els.resultText.textContent = `Making sheet ${s + 1} of ${L.sheets}...`; const page = pdf.addPage([L.W, L.H]); // 1. Text, labels and lines on a canvas, with holes where the pictures go const c = document.createElement('canvas'); c.width = Math.round(L.W * k); c.height = Math.round(L.H * k); const placed = await drawSheet(c.getContext('2d'), o, L, s, k, 'overlay'); // 2. Each picture as a JPEG at the chosen resolution, placed in its hole for (const { frame, rect } of placed) { const scale = Math.min(1, (rect.w * dpi / 72) / frame.w); const jpg = await pdf.embedJpg(await imageAsJpeg(frame, frame.w * scale, frame.h * scale)); // PDF y runs from the bottom of the page, the canvas y from the top page.drawImage(jpg, { x: rect.x, y: L.H - rect.y - rect.h, width: rect.w, height: rect.h }); } // 3. The text layer on top, as one transparent PNG covering the page const pngBlob = await canvasToBlob(c, 'image/png'); const png = await pdf.embedPng(new Uint8Array(await pngBlob.arrayBuffer())); page.drawImage(png, { x: 0, y: 0, width: L.W, height: L.H }); c.width = 1; // free the canvas memory } pdf.setTitle(state.title || 'Storyboard'); return pdf.save(); } Here's what happens on each page:
addPage([L.W, L.H])creates a page in points, the same units as the layout.- The text layer is drawn at
k = 300 / 72, which is 300 pixels per inch. - Each picture is resized to the chosen dpi for the size it has on the page. A 4000-pixel photo shown 2 inches wide only needs 600 pixels at 300 dpi, so the file stays small.
Math.min(1, ...)makes sure small pictures are never enlarged. - The pictures are drawn first, then the transparent PNG on top of them.
Note the y coordinate: L.H - rect.y - rect.h. The layout and the canvas measure y from the top of the page, but PDF measures y from the bottom. Forgetting this flip puts every picture upside down in the page, the classic PDF-lib mistake.
Setting c.width = 1 after use frees the canvas memory right away, which matters on phones when there are many sheets.
Renaming and Downloading
The file name comes from a text field, cleaned of characters that aren't allowed in file names:
// ---------- Download ---------- function cleanFileName(name) { const n = name.trim().replace(/\.pdf$/i, '').r...


